
I wrote in my last column that this would be the next thing we're going to discuss for the subject of website performance, and how to optimize it. I am going to be concluding the series with this article, and I wish you safe journey ahead.

I'll be breaking this in three parts,
- Introduction to PageSpeed
- Installing PageSpeed on Your Apache Server
- Configuring PageSpeed for Optimal Performance
all of which will be brief, but informative enough to help you get everything up and running.
Introduction to PageSpeed
The PageSpeed Module (mod_pagespeed) is an open-source Apache & Nginx module built by Google - in order to help webmasters make the web much faster, with the help of rewriting web pages to reduce latency and bandwidth.
When you profile a web page with Page Speed, it evaluates the page's conformance to a number of different rules. These rules are general front-end best practices you can apply at any stage of web development.

You can profile your own web page on the official Page Speed homepage, it will give you a glimpse of how well your website is performing in terms of speed, and whether you should consider upgrading to PageSpeed Module for an increased boost to performance.
Installing PageSpeed on Your Apache Server
Unfortunately, there is no apt-get way of installing mod_pagespeed, and so we will have to download the debian packages ourselves, it's extremely easy to do and works the same way on all Unix systems. Nginx users should refer to this page.
65bit version:
wget https://dl-ssl.google.com/dl/linux/direct/mod-pagespeed-stable_current_x86_64.rpm
32bit version:
wget https://dl-ssl.google.com/dl/linux/direct/mod-pagespeed-stable_current_i386.rpm
Install:
rpm -U mod-pagespeed-*.rpm
Remove Files:
rm mod-pagespeed-*.deb
Restart HTTP Server:
/etc/init.d/httpd restart
At this point, you'll have a fully functional - latest stable version - installation of the PageSpeed Module, and what is left now is to look at some of the configuration options. I highly recommend heading back to the PageSpeed Insights page, and seeing whether there has been a significant improvement in your websites speed.
Configuring PageSpeed for Optimal Performance
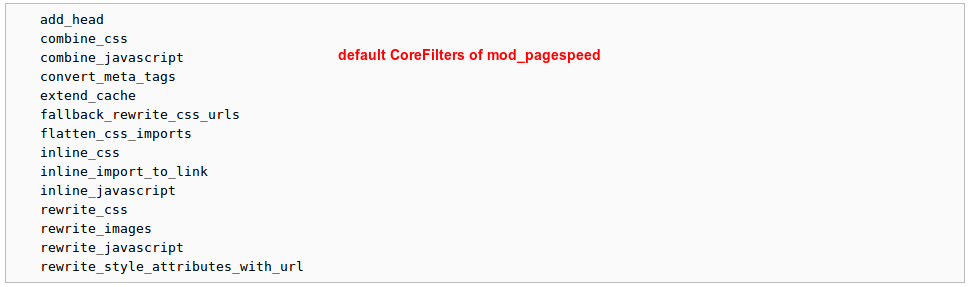
PageSpeed offers two default "levels" to simplify configuration: PassThrough and CoreFilters. The CoreFilters set contains filters that the PageSpeed team believes are safe for most web sites. By using the CoreFilters set, as PageSpeed is updated with new filters, your site will get faster.
To disable the CoreFilters, you can specify:
Apache:
ModPagespeedRewriteLevel PassThrough
Nginx:
pagespeed RewriteLevel PassThrough;
It's very possible that beyond this point, there is nothing else of you to do, and by default - the PageSpeed module will enable all of the necessary modules to help your site follow the best practices, and there will be a significant increase in the overall performance.
But, if you feel like experimenting and taking it to the next level, the next best thing to do is visit the PageSpeed Modules page, which is a list of filters that are recommended to use for all kinds of web projects, all of which include a sample and explanation of how they work.
To add those new filters, you'll need to open the following file:
nano /etc/apache2/mods-available/pagespeed.conf
and find the line that says ModPagespeedRewriteLevel PassThrough:
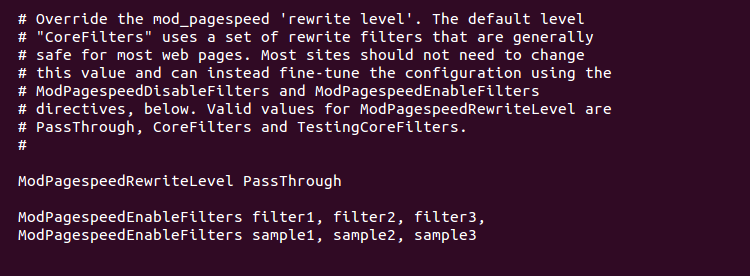
You should comment it out (remove the #), and below that begin adding your own custom filters by using the ModPagespeedEnableFilters directive. After changes have been made, remember to restart the web server for them to work.
It's possible that the first few times of playing with the config file might be confusing, but for that very reason - Google has a very broad directory of these filters, with explanations of what they do and how they work.
I was able to increase the performance of my own WordPress blog significantly, and if you're a WordPress user like me, it's perfectly fine to run the PageSpeed module alongside APC, and a caching plugin of your choice, if anything - it is encouraged to do so.